Samos die II
·< Anfang
|
Übersicht
|
Ende >·
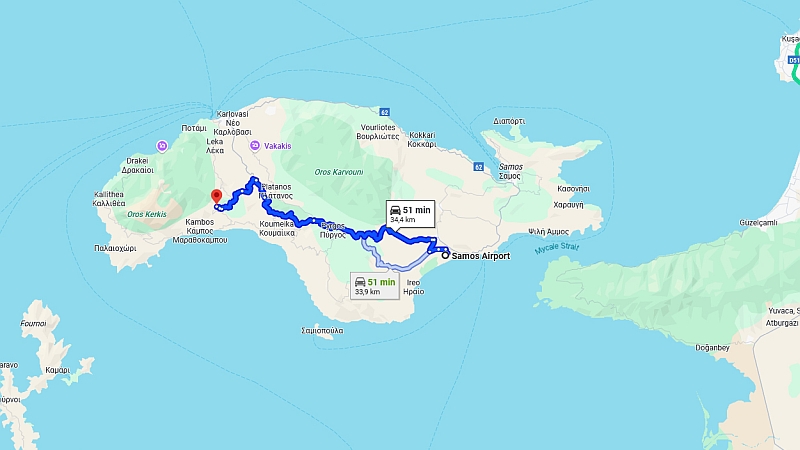
Anfahrt
Bild 2
von 166
© Copyright images: kTe Tikled